Friday, July 8, 2011

Free-For-All Friday: Kids Mailbox

I bought this mailbox months ago, it sits on a little bookshelf in our loft.  Every now and again there's a "Special Treat" inside (typically a lollipop) whenever Little Man's behavior has been extra good.  My original idea behind getting it would be to put little notes and treats and things in it, and to decorate it for different seasons/holidays. 

You know what they say about the best laid plans...so I had never gotten around to decorating it.  This morning I decided that I would use the cardstock and some of the scraps left over from Cosmo Cricket Salt Air kit I got from Apron Strings to add a little color and fun to it. 

12x12 paper wasn't long enough to cover the whole thing, which was just as well, because the little mailbox flag was in the way.  So I trimmed a piece to fit right up under it as much as I could.

Next I created a little notch (you can just barely see it in the upper lefthand corner of the paper) to fit around the pin that keeps the flag attached to the mailbox, so that the papers line up flush to one another.

Then, flip the whole mailbox on its front end, and trace the front "door" part on the backside of whatever paper you are using as the base.  Cut that out carefully and adhere to the door.  You can choose to cut a trim piece around the door or not.  I opted not to in this case, as the little hands that are constantly opening and closing this would rip it off in about 5 seconds flat :)
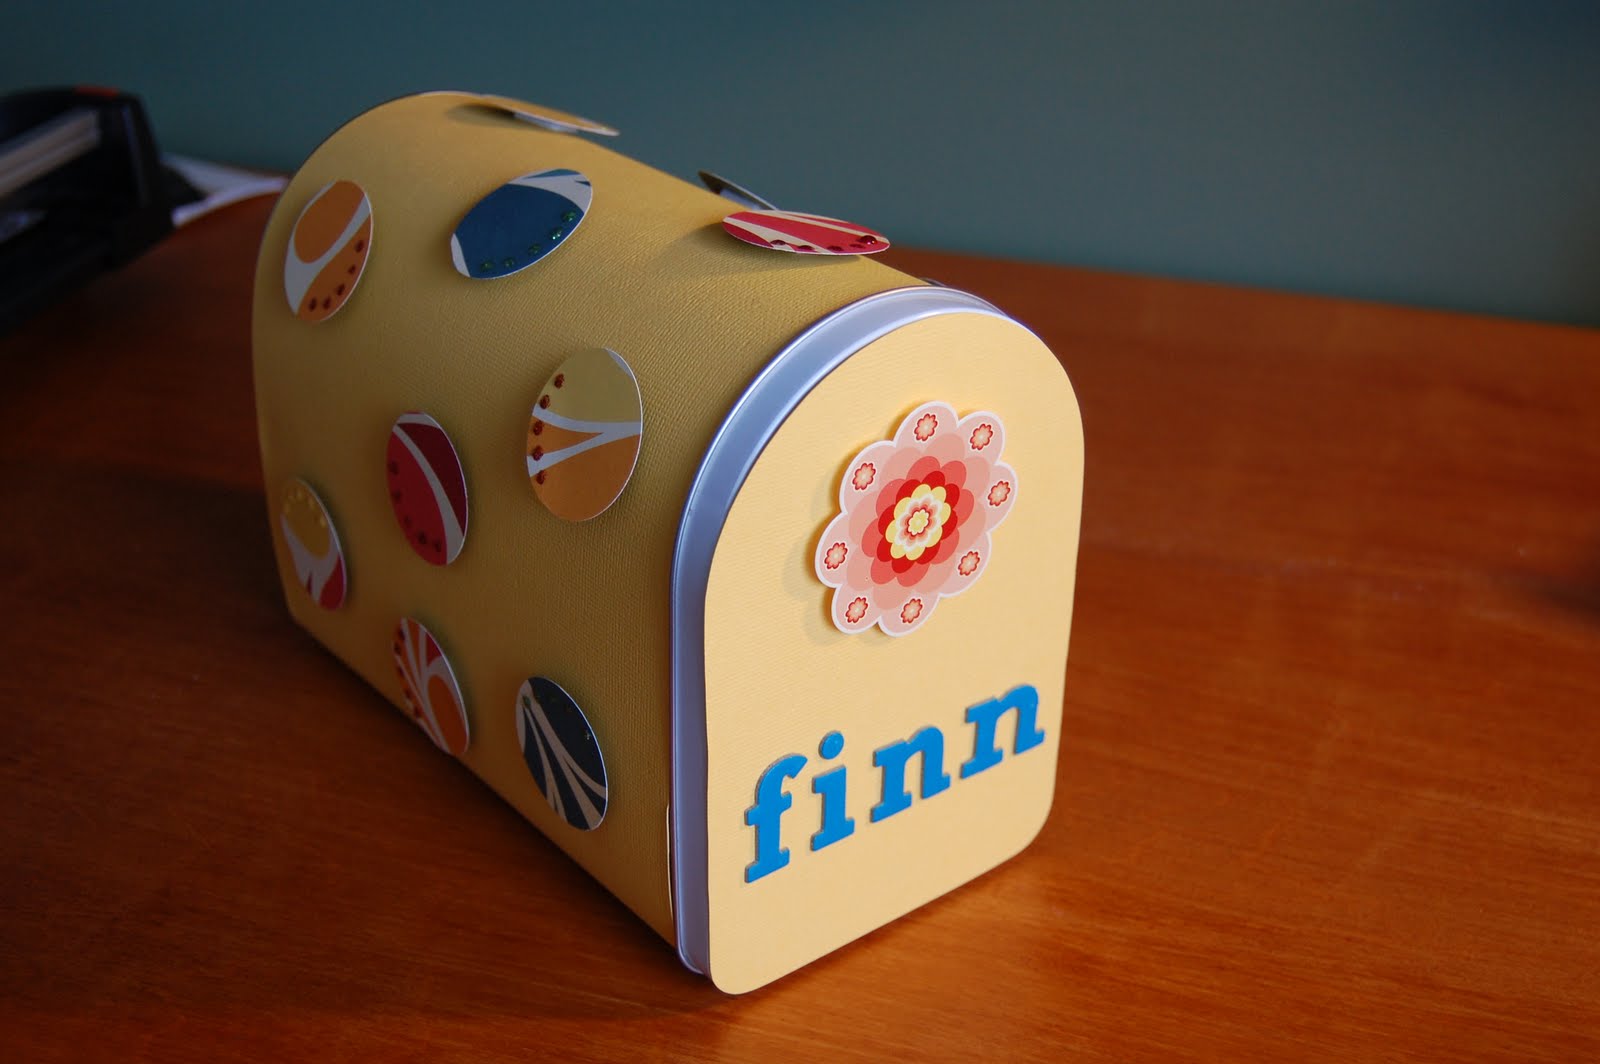
 Lastly, decorate as you see fit!  I created this out of scraps from one of my kits, so I just took that scrap paper and one of my trusty Marvy Uchida circle punches to make as many circles as I could out of the scrap.  Some Thickers for his name (like he had any question as to whose it is!) and a pop-dot under one of the kit stickers for the door.

Keeping things simple, I used Stickles in hues of the colors of whatever circle I was working on, to create some little dots on each one and give it some sparkle.  'Cause who doesn't love things that sparkle?!  That's all there was to it, a simple little mailbox, fit for some "Special Treats".

**Sidenote, after I was finished and had taken photos, Finn wanted to "decorate it too!" so all that lovely yellow paper is now covered in 2 year old marker scribbles.  I mean artwork :)  See you next week with a new Yummy Monday recipe that'll sure to "oohhhh" and "ahhhh" you!


Wednesday, July 6, 2011

Scraptastic Wednesdays: 4th of July

Well, well, well, look who's Johnny-on-the-Spot and has already scrapped the most recent holiday. 

**Cue applause now**

I'd like to take full credit for being motivated, having a wonderful kit to work with, and a fantastic sketch.  In reality, I can only take credit for the first though.  This layout was made with  one of the fabulous Bigger Than A Breadbox July kits from Apron Strings.  I agreed to be a Guest Designer (when I capitalize it, it makes me feel more important ;) for Lori for the month of July, and thus just HAD to (twist my arm) come up with some things to keep people reading her blog motivated.  Fingers crossed it works!

The stars must have been aligned for me this week, because it just so happened that there was a lovely little 2-sided sketch this week over at Sketchy Thursdays that piqued my interest, so I used that one to give myself the little push I needed to put this together! 


This layout was made using the My Mind's Eye-American Made kit.  Little Man was chowing on some amazing Red, White & Blue cupcakes made by my fellow scrappy friend Melissa (shout-out to Melissa!) which was one of my favorite photos of the day.  The other one which is really meaningful is the photo of Little Man, the Hubs, my FIL and his father.  A 4 Generation photograph can be a hard thing to come by these days, and I love to document as often as I can the fact that we have all for Generations of Siebert Men accounted for :)


I used somr red, silver & blue Stickles to make a faux firework coming out of the top of the layout.  Adds a little sparkle, and makes up for the fact that all my firework photos came out mediocre at best.


I love these banners included in the kit, so I cut the circle one up a little and layered part of it on top of the other on pop-dots for dimension.


I was torn with what to do with the crepe ribbon.  I'm not really very comfortable using crepe (although I bought a metric ton of it at CKC earlier this year!) it's so darn fragile!  I took a piece of the ribbon though, and folded it into a sort of crepe flower, and used the red plastic ribbon embellishments in the center to help stick it all together.  I added a line of silver Stickles along the edge to give it some definition too.

I hope everyone had a wonderful (and safe!) 4th of July this year!  I know we're still cleaning up from the aftermath of our annual party.  My backyard looks like the day after a State Fair...

Tuesday, July 5, 2011

Yummy Monday (Tuesday): Kai's Famous Chocolate Chip Cookies

Ok, maybe I should call these Betty Crocker's Famous Chocolate Chip Cookies, because her recipe is the base of mine.  You can find hers here, but I'll recap it here as well:

3/4 cup brown sugar
3/4 cup white sugar
1 cup butter softened
1 teaspoon vanilla
1 large egg
2 1/4 cups flour
1 teaspoon baking soda
1/2 teaspoon salt
12oz bag of chocolate chips


Mix up the sugars, butter, egg and vanilla together.  Double points if you can do it in a Kitchen Aid mixer, it makes life SOOOO much easier!  One major tip is to be very careful about how soft your butter gets.  Too soft & melty and your cookies will completely flatten when you bake them.  I tend to keep my butter on the firmer side (another reason for the mixer) and keep my cookies nice and thick. 

I add the salt and baking soda next, and while the mixer is going on slow, add the flour a 1/2 cup at a time until it's thoroughly mixed.  Add in the chocolate chips, dig your spoon for a nice big "taste test" and relax!  Funny how whatever the quantities they say it's going to make, it always makes so much less by the time I actually get around to baking them ;) 

Pop them in the oven at 375 degrees for no more than 9 minutes.  They may look a little undercooked when you take them out, but take them out nonetheless.  They'll continue to cook a little on the hot cookie sheet, and once they're cool, they'll be just a tiny bit crunchy on the outside, but soft and gooey on the inside.  Perfection.

Friday, July 1, 2011

Free-For-All Friday: Pencil Vase

I am the homeroom mom for Finn's daycare class, which kind of cracks me up.  My responsibilities were much more lax than I think a normal homeroom mom's would be, but either way, the end of the "school year" snuck up on me (as most things seem to these days!) and about a week before his classroom summer party, I was scrambling to send out letters to the other parents so that they could all chip in on a group gift if they so chose. 

A quick Google Images search of teacher's gifts brought up several versions of the pencil vase, which I thought was really adorable.  Finn has 2 teachers in his class (both named Jessica, coincedentally!) so with my limited timeframe, I thought this would be an easy and fun project to whip together. 

I went to Michael's and bought a couple of these glass jars with lids.  I didn't need the lids obviously, but the vases were the perfect size and shape, so I just discarded the lids when I got home.  I bought some very inexpensive Dixon #2 pencils to wrap them in.  Oh, and pay not attention to the mess on my worktable.  I was multi-projecting.  'Nuff said.

Next I just hot glued the pencils around the vase.  You have to pay pretty close attention to the spacing and to make sure you keep them really straight or else the last pencil in will look weird.

Next I whipped up a couple of apples from my Doodlecharms cartridge, and put a green Thickers "J" in each of them for Jessica(s!)

Some bright green ribbon around them, attach the apples and you're done!  I really meant to get photos of the vases with the sunflowers in them (they looked so pretty) but true to form, I ended up buying them at the 11th hour (literally on my way to the school for the party) so I didn't have time to photograph them before I handed them over to his teachers.  The other thing I added was one of those plastic card holders stuck admist the flowers that had a gift card for each teacher, as well as a little 'Thank You' note from the class.  They were a hit!

Wednesday, June 29, 2011

Scraptastic Wednesdays: 4th of July Banner

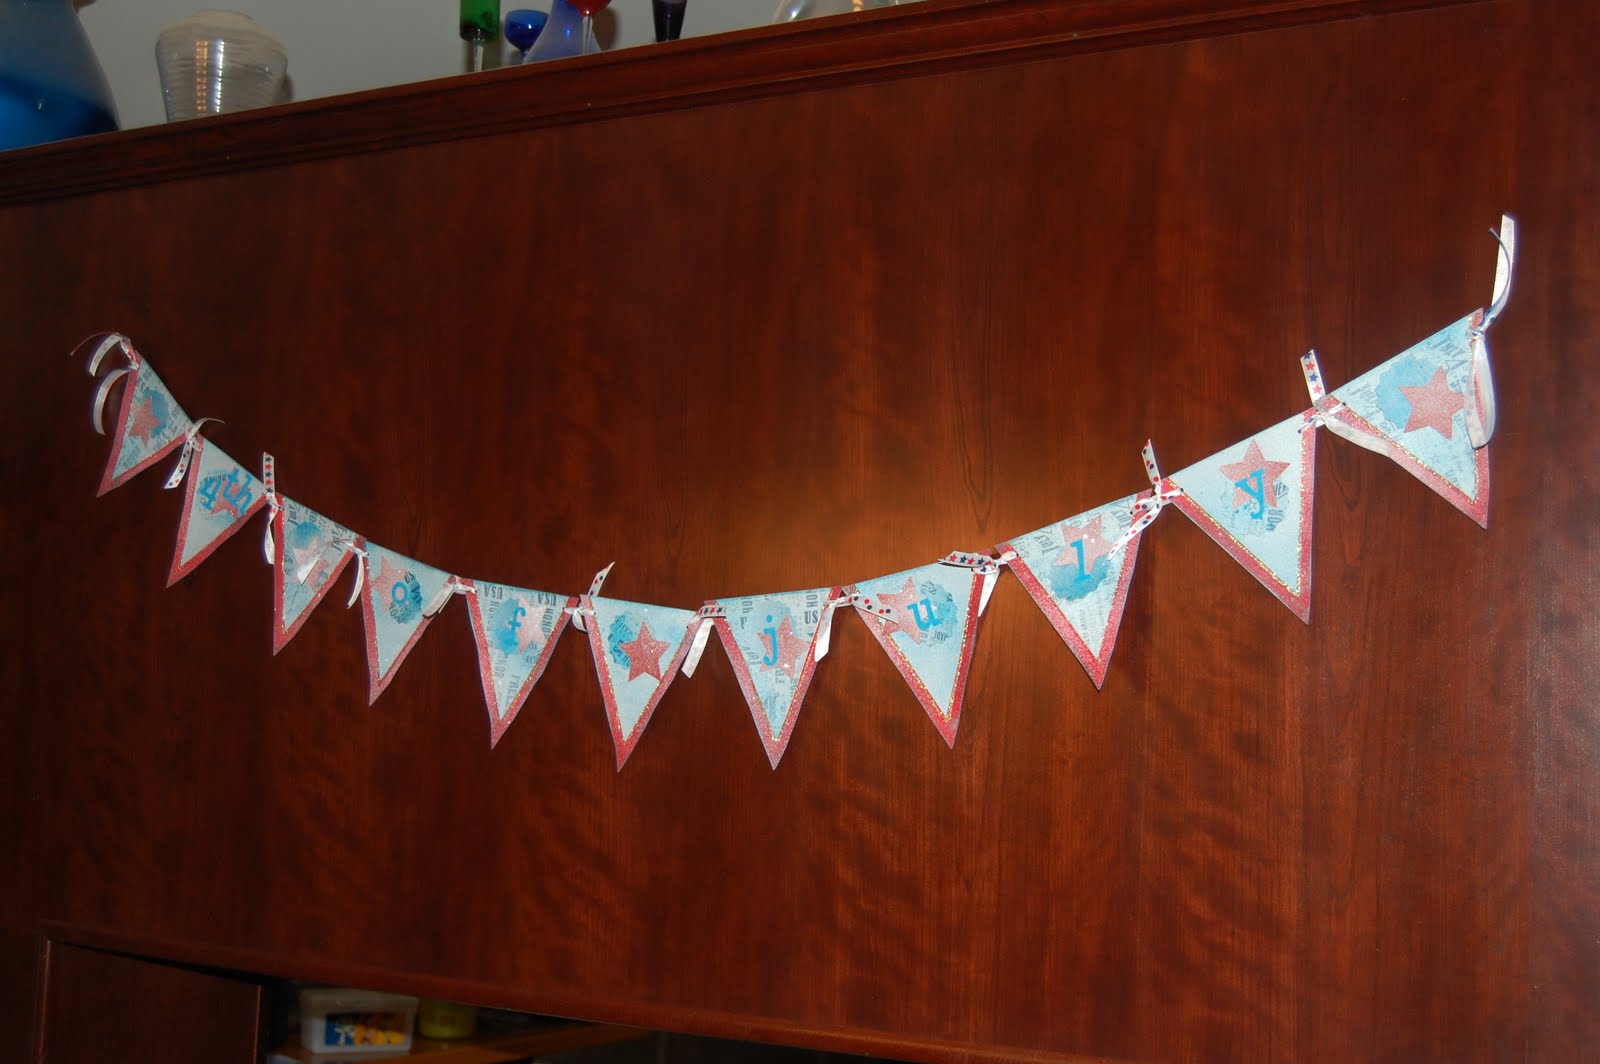
I was lucky enough to be asked to be a Guest Designer over at Apron Strings for the month of July, so I was able to get my hands on their Bigger Than a Breadbox kits a little early :)  I whipped up this great little banner just in time for our big 4th of July Bash using the My Mind's Eye American Made collection, my Independence Day Cricut Solutions cartridge, Tattered Angels Glimmer Mist in Blue Frost, and Studio Calico Mr. Huey in Calico White.  Oh, and the alpha is Thickers Sprinkles.  The ribbon is from the $1 bin at Michaels and is the only thing I used not in the kit!


So who's feeling festive?!

Monday, June 27, 2011

Yummy Monday: Banana Muffins

We always have a ton of bananas in our house.  Little Man loves them, called them "Banas"  He's actually eaten 2 in a row, and asked for a third.  Now I'm not sure if you can overdose on potassium, and anything else wonderful that you get in bananas, but we usually limit his banana intake to two a day, just in case.

I digress.  Every now and then, we'll go thru a week where he hasn't devoured every banana in the house.  When that happens, the picture below is what happens to those forgotten bananas.  Now what happened to this fabulous summer recipe I promised you last Friday?  It's here, hidden in something as basic as banana muffins. 

The wonderful thing about banana muffins is their versatility.  Straight up banana muffins, banana nut, banana "crumb" chocolate chip banana, strawberry banana, blueberry banana.  I could go on.  So here's my banana muffin recipe, and below will be some ways to vary it to fit your tastes, and your summer produce buys.

2/3 cups of milk
1/2 cup vegetable oil (*health kick:  substitute 1/2 cup unsweentened applesauce*)
2 eggs
2 cups flour (*health kick: substitute whole wheat flour*)
1 cup brown sugar
1 tablespoon baking powder
1 teaspoon baking soda
1 teaspoon salt
4 very ripe bananas

Preheat your oven to 400 degrees, and grease just the bottom of your muffin tins (or use liners).  This recipe will make 18 regular muffins or 72 itty bitty baby muffins, or any combination thereof.  For all intents and purposes, 6 regular muffins is equal to 24 baby muffins.

Mash bananas, milk, oil (applesauce) brown sugar and eggs in a large bowl.  Stir in flour, baking soda, baking powder, and salt.  To summerify (yeah, I just made that word up) this recipe add in:

1 cup blueberries OR
1 cup strawberries (chopped up pretty small)

To make this into a Fall recipe, add in:
1 cup finely chopped apples and 2 tbsp cinnamon

For the chocolate lovers, add in 1 cup chocolate chips


Fill the cups a good 3/4+ full.  I love a good streusel topping, however my waistline does not appreciate it as much.  I create a delicious "fake" streusel topping by sprinkling a little cinnamon on the batter once it's in the tins, and then about a teaspoon or less of brown sugar on top of that.  It gives the muffins just a little extra spice and sweetness.

Bake the baby muffins at 400 degrees for 9-10 minutes.  The regular sized muffins can be cooked at 400 degrees for 18-20 minutes.  In this photo you can see I added chocolate chips to the mini ones in this batch, and 3 of the 6 regular muffins with my faux streusel topping are already gone, mere minutes after I took them out of the oven!  Enjoy!


Friday, June 24, 2011

Free-For-All Friday: First Movie

Now originally I had planned to make the Free-For-All Friday exclusively for those crafty, fun, non-scrapbooking-potentially-papercrafting other hobbies.  And I had a really good one to share with you today, no really I did.  It's just that....well.....I fell asleep. 

Running around all morning with the toddler wiped me right out.  So when we arrived back home around 1pm today, I tucked him into his bed and then went to lay down myself for just a few minutes and rest before I was going to come up here and crank out this great little project.  Except when I next opened my eyes, it was 4pm.  I'm not going to lie, it was bliss.

So off in a scramble I was to get ready for what I'm going to share with you today, which are photos from Finn's very first movie in the theatre experience.

These are our friends Scott & Nicole, with their two adorable boys.  It was their first movie in the theatre as well, and with how hectic our lives are it seems, it was so nice to spend some time with them.

Finn has started to make this face anytime I get close to him with my camera.  I have a feeling this is going to be a long-standing feud, my desire to capture everything and his desire to just be left alone Ma!  At least the husband is still smiling at me.

This face (as were all of the photos taken in the actual theatre) was taken during the previews.  He was totally amazed.

He had begun to lose his sense of humor (we challenged the attention-span of a 27 month old, I do get it) so when the movie was over, I was able to just grab one more quick photo in front of the big display outside.  This kind of sums up the movie, and at least I've got them!  Add in the ticket stub and maybe a few cute graphics from online, and I have a feeling this could be one fun layout!

See you on Monday (if not before!) with a new summer recipe that's a hit with my family, and hopefully will be for yours too!

Total Pageviews