Showing posts with label Crafting. Show all posts

Friday, July 22, 2011

Free-For-All Friday: Just For You Card

"Just for you"  The perfect sentiment for a plethora of occasions. 

"Just for you" because you're sick or have been feeling down
"Just for you" because of no reason whatsoever
"Just for you" because it's your birthday, so it's all about you
"Just for you" because it's Mother's or Father's Day

I could go on.  Without further ado, a couple of quick photos of a simple card made with all the scraps from the one of the July Bigger Than A Breadbox kits from Apron Strings.


Studio Calico mist on the pail, covered with Crackle Accents, Stickles & some Salt Air embellishments. 

Just For You :)

Friday, July 8, 2011

Free-For-All Friday: Kids Mailbox

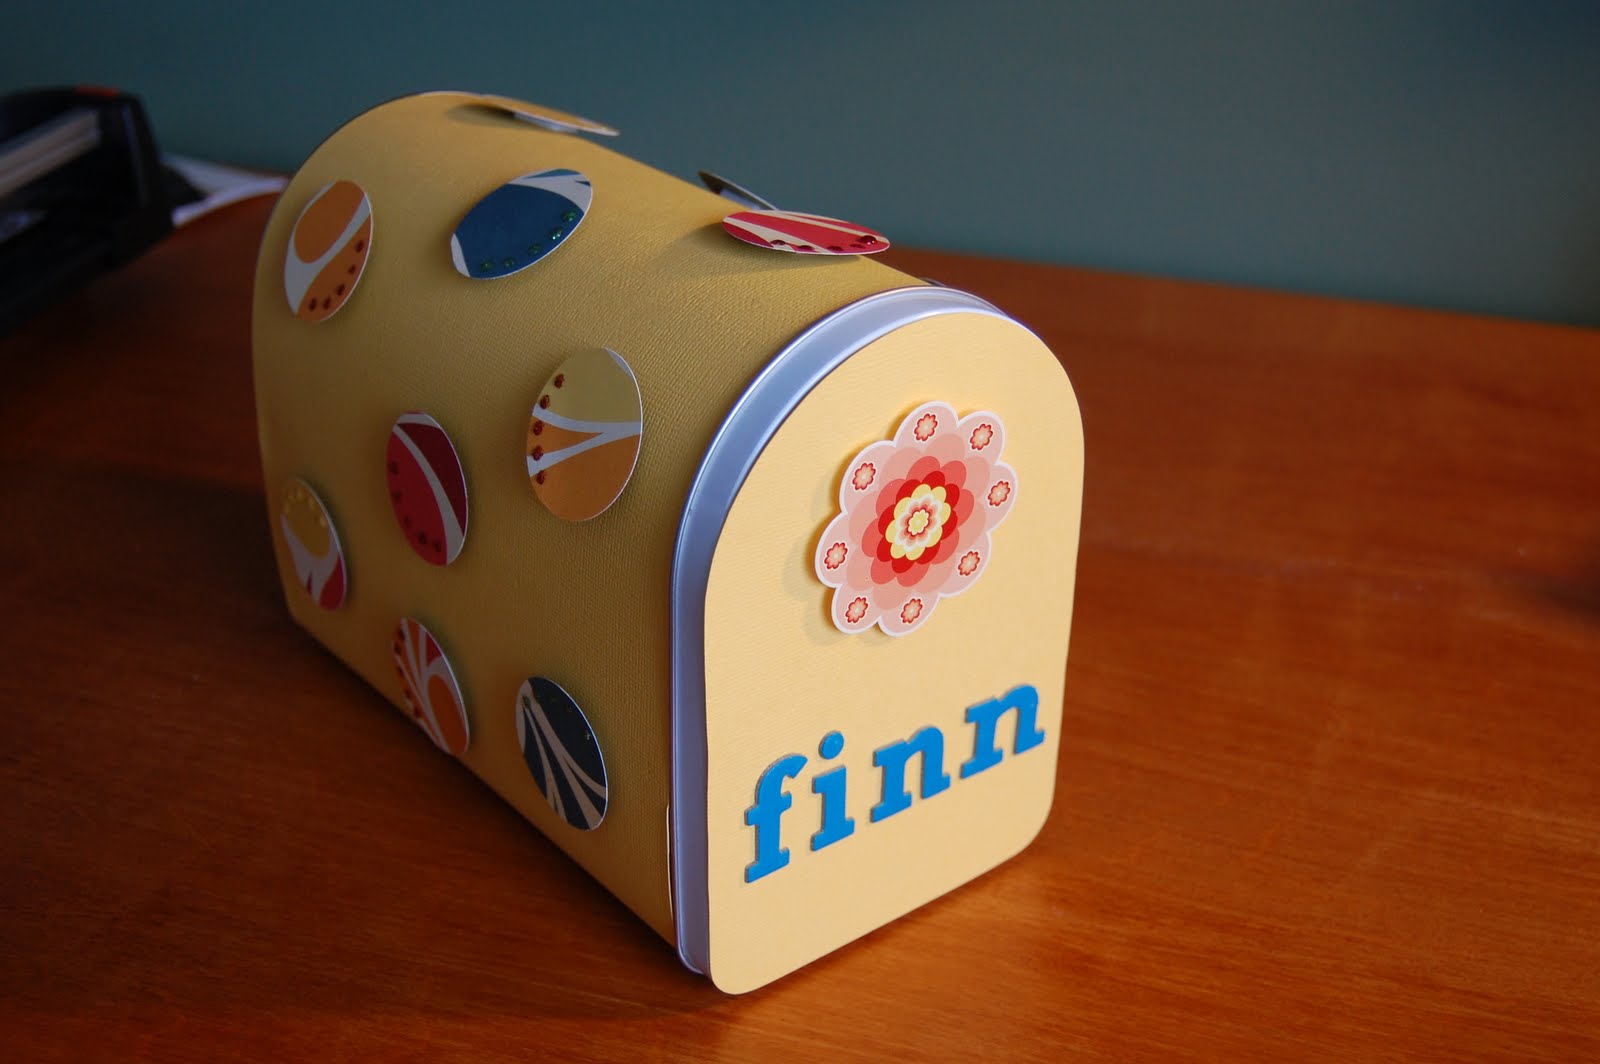
I bought this mailbox months ago, it sits on a little bookshelf in our loft.  Every now and again there's a "Special Treat" inside (typically a lollipop) whenever Little Man's behavior has been extra good.  My original idea behind getting it would be to put little notes and treats and things in it, and to decorate it for different seasons/holidays. 

You know what they say about the best laid plans...so I had never gotten around to decorating it.  This morning I decided that I would use the cardstock and some of the scraps left over from Cosmo Cricket Salt Air kit I got from Apron Strings to add a little color and fun to it. 

12x12 paper wasn't long enough to cover the whole thing, which was just as well, because the little mailbox flag was in the way.  So I trimmed a piece to fit right up under it as much as I could.

Next I created a little notch (you can just barely see it in the upper lefthand corner of the paper) to fit around the pin that keeps the flag attached to the mailbox, so that the papers line up flush to one another.

Then, flip the whole mailbox on its front end, and trace the front "door" part on the backside of whatever paper you are using as the base.  Cut that out carefully and adhere to the door.  You can choose to cut a trim piece around the door or not.  I opted not to in this case, as the little hands that are constantly opening and closing this would rip it off in about 5 seconds flat :)

 Lastly, decorate as you see fit!  I created this out of scraps from one of my kits, so I just took that scrap paper and one of my trusty Marvy Uchida circle punches to make as many circles as I could out of the scrap.  Some Thickers for his name (like he had any question as to whose it is!) and a pop-dot under one of the kit stickers for the door.

Keeping things simple, I used Stickles in hues of the colors of whatever circle I was working on, to create some little dots on each one and give it some sparkle.  'Cause who doesn't love things that sparkle?!  That's all there was to it, a simple little mailbox, fit for some "Special Treats".

**Sidenote, after I was finished and had taken photos, Finn wanted to "decorate it too!" so all that lovely yellow paper is now covered in 2 year old marker scribbles.  I mean artwork :)  See you next week with a new Yummy Monday recipe that'll sure to "oohhhh" and "ahhhh" you!


Friday, July 1, 2011

Free-For-All Friday: Pencil Vase

I am the homeroom mom for Finn's daycare class, which kind of cracks me up.  My responsibilities were much more lax than I think a normal homeroom mom's would be, but either way, the end of the "school year" snuck up on me (as most things seem to these days!) and about a week before his classroom summer party, I was scrambling to send out letters to the other parents so that they could all chip in on a group gift if they so chose. 

A quick Google Images search of teacher's gifts brought up several versions of the pencil vase, which I thought was really adorable.  Finn has 2 teachers in his class (both named Jessica, coincedentally!) so with my limited timeframe, I thought this would be an easy and fun project to whip together. 

I went to Michael's and bought a couple of these glass jars with lids.  I didn't need the lids obviously, but the vases were the perfect size and shape, so I just discarded the lids when I got home.  I bought some very inexpensive Dixon #2 pencils to wrap them in.  Oh, and pay not attention to the mess on my worktable.  I was multi-projecting.  'Nuff said.

Next I just hot glued the pencils around the vase.  You have to pay pretty close attention to the spacing and to make sure you keep them really straight or else the last pencil in will look weird.

Next I whipped up a couple of apples from my Doodlecharms cartridge, and put a green Thickers "J" in each of them for Jessica(s!)

Some bright green ribbon around them, attach the apples and you're done!  I really meant to get photos of the vases with the sunflowers in them (they looked so pretty) but true to form, I ended up buying them at the 11th hour (literally on my way to the school for the party) so I didn't have time to photograph them before I handed them over to his teachers.  The other thing I added was one of those plastic card holders stuck admist the flowers that had a gift card for each teacher, as well as a little 'Thank You' note from the class.  They were a hit!

Wednesday, June 29, 2011

Scraptastic Wednesdays: 4th of July Banner

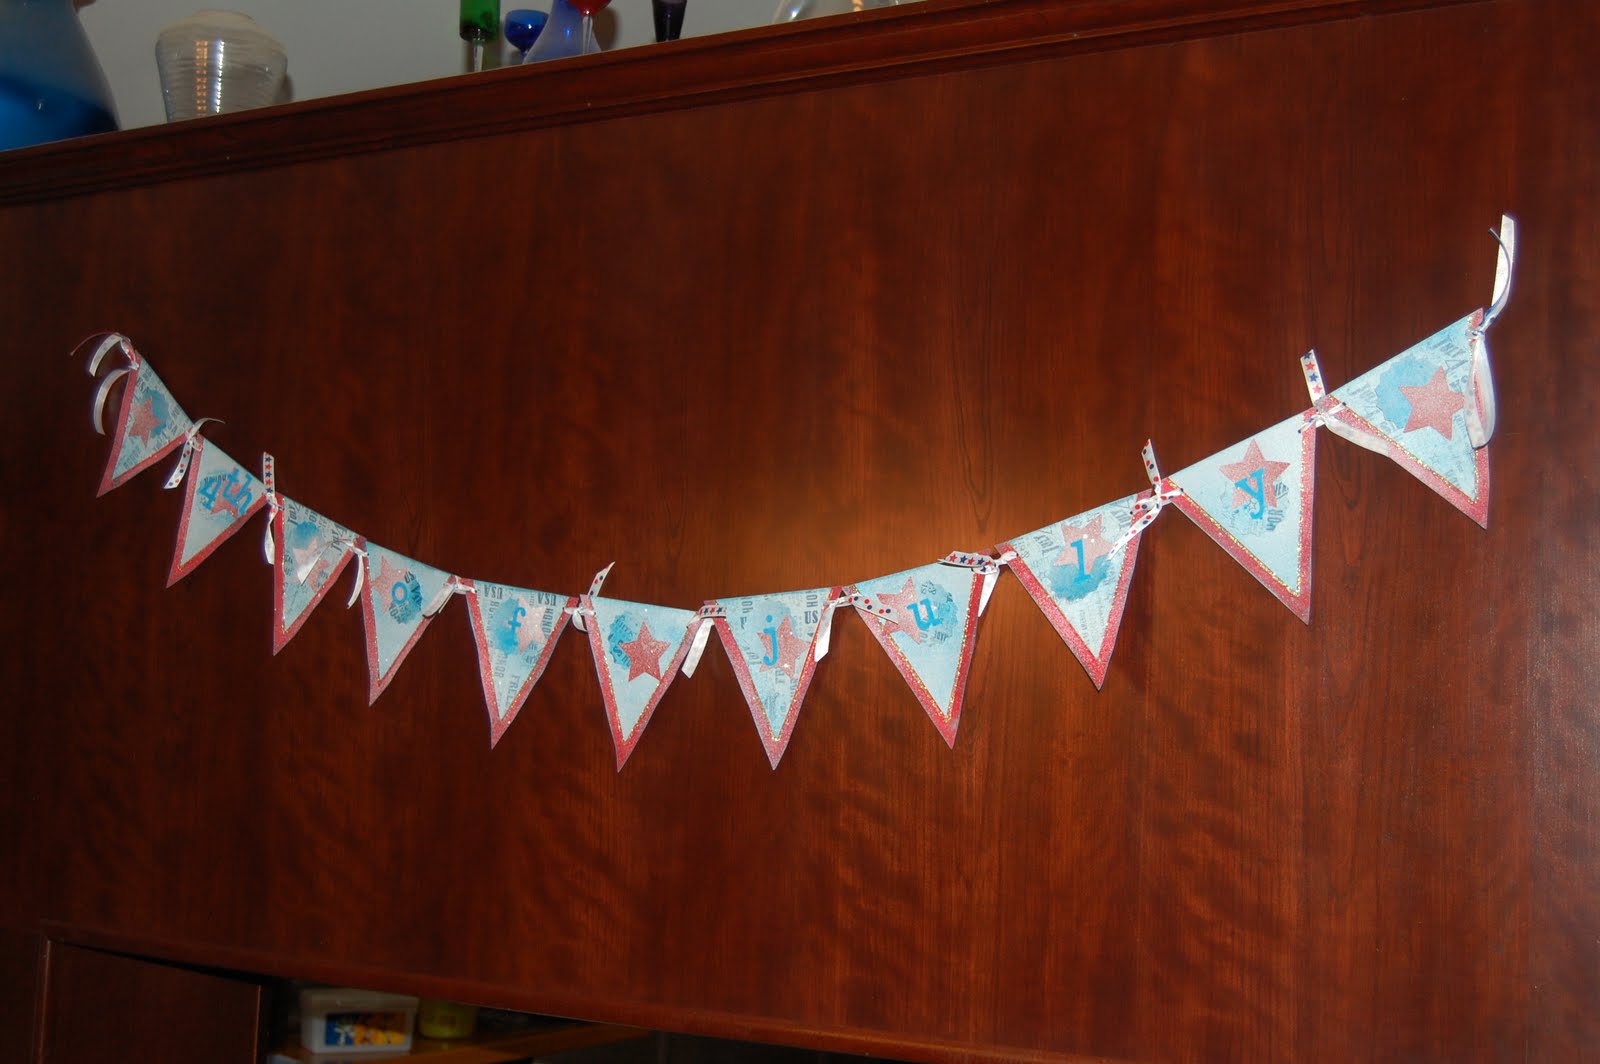
I was lucky enough to be asked to be a Guest Designer over at Apron Strings for the month of July, so I was able to get my hands on their Bigger Than a Breadbox kits a little early :)  I whipped up this great little banner just in time for our big 4th of July Bash using the My Mind's Eye American Made collection, my Independence Day Cricut Solutions cartridge, Tattered Angels Glimmer Mist in Blue Frost, and Studio Calico Mr. Huey in Calico White.  Oh, and the alpha is Thickers Sprinkles.  The ribbon is from the $1 bin at Michaels and is the only thing I used not in the kit!


So who's feeling festive?!

Friday, June 17, 2011

Free-For-All Friday: Potty Charts

Short and sweet, because we're on vacation right now!

Nothing fancy about this, but my little 2 year old is starting to potty train.  Now I'm no potty training expert, but I'm pretty sure that the rewards system works.  So off we went to Target where Finn picked out a HUGE package of special potty stickers.  I printed this adorable Lightening McQueen "potty chart" online here for him to put all his stickers on.


Simple a project as it gets.  I just glued the chart onto some cardstock and rounded the edges.  Added some Thickers for his title, a little glitter around the border and some twine to hang it up and we're done!  Cute enough motivation for any little wizzer ;)


A nod to the Cape and all the wonderful seafood here, this upcoming Yummy Monday is going to be of the seafood variety, so see you then!

Friday, June 10, 2011

Free-For-All Friday: Porcelain Knobs

My beautiful niece Emily is going to become a big sister any day now, and is going to be sharing a room with her new baby sister, Elianna.  My mother (who is an extraordinarily talented interior designer-thanks for the creative genes Mom!) was designing the room for them, and requested that I paint some white porcelain knobs for all of the girl's refinished furniture. 

So she snuck some of the their bedding over to me for inspiration (it was a surprise for my sister), and here's what I was able to come up with:


To create your own hand-painted porcelain knobs, you first need to buy new or clean old knobs with a little rubbing alcohol.  I picked up some Americana Gloss Enamels  paint you can find online, or at any Michaels store. 


Paint whatever your little heart desires, and then let the knobs sit and air dry for 48 hours.  When they're done air drying, place them in a cool oven, and then heat it to 325 degrees for 30 minutes.  Turn off the oven and let the knobs cool down in there completely before removing.  Voila!  Hand-painted, personalized knobs, perfect for giving a "blah" piece of furniture a face-lift!

Be sure to check back for a new Yummy Monday recipe, and have a great weekend!

Total Pageviews